Equipment Suggestions for Photographing the Milky Way
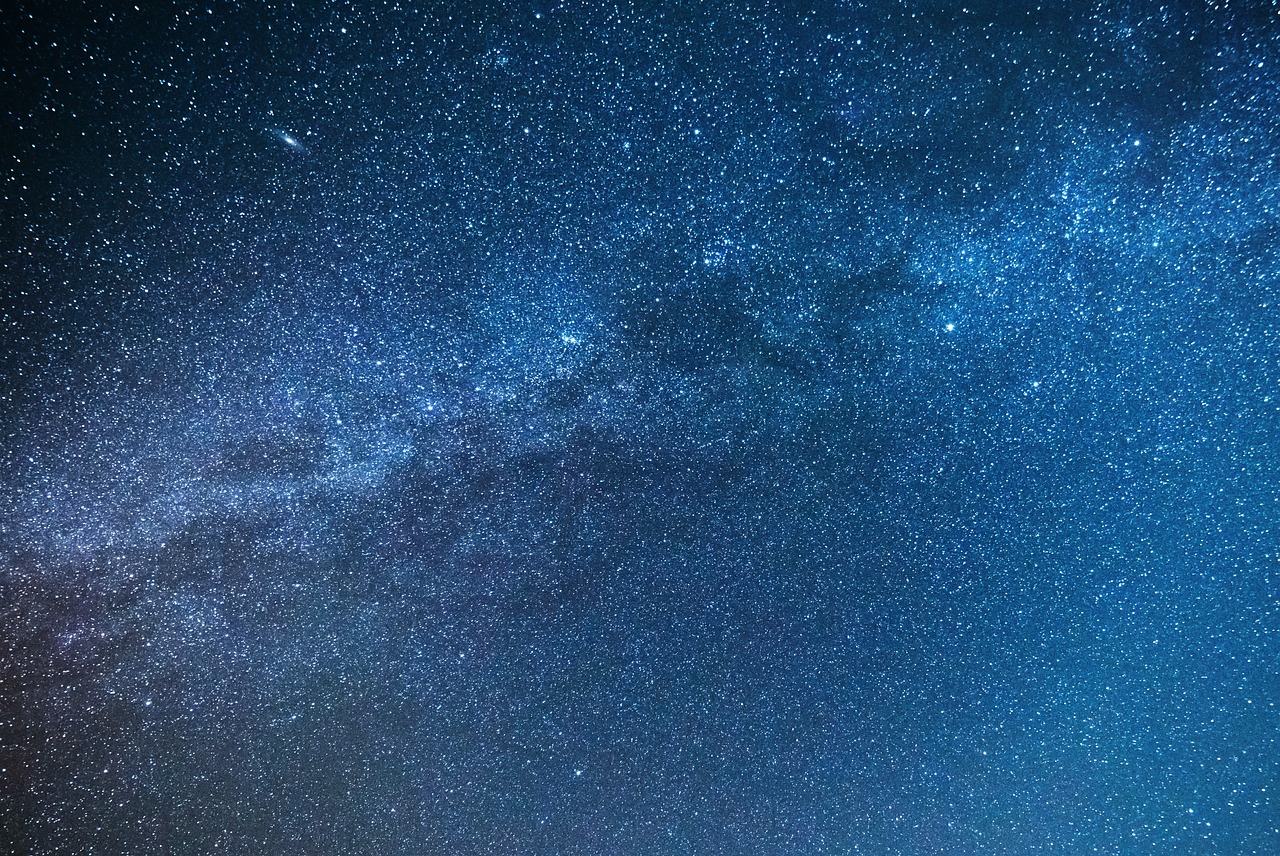
Seeing the Milky Way is an awe-inspiring experience in and of itself, and photographing it is one of my favorite things in the world. Although I’ve written several articles about photographing the stars, today I’d like to focus on the equipment required to take great night sky photos.
This is a follow-up to my previous article on the best landscape photography equipment. As a result, I’ll use the same rating scale to assess the usefulness of each type of astrophotography equipment:
- 1/4: Rarely worth getting
- 2/4: Can be useful
- 3/4: Very useful
- 4/4: Must buy!
However, I couldn’t think of any “rarely worth getting” equipment popular among astrophotographers this time, so there is nothing rated “1/4” in this article! Almost every common accessory for Milky Way photography can be useful in some circumstances, even if I don’t use it myself.
Without further ado, here’s my breakdown of the gear you’ll need to take great nighttime photos of the Milky Way.
Tripod (4/4)
It goes without saying that a tripod is required for Milky Way photography. I’m sure there are some people who take handheld Milky Way shots just to say they can, but they’re losing a lot of image quality in the process.
I didn’t bring a tripod with me once because I was traveling with friends and didn’t expect to do much photography. Our view of the Milky Way turned out to be spectacular. I attempted some shots by placing my camera on the ground and pointing it toward the sky while using a self-timer. As a result of the camera slipping in the grass, I ended up with bad compositions, bad focus, and blur. My friends took better photos of the Milky Way with their phones. It was embarrassing. Bring a tripod!
Full-Frame Camera (3/4)
The standard recommendation for Milky Way photography is to purchase a camera with the best possible high ISO noise performance. While this is true, two techniques I’ll discuss shortly (star trackers and image averaging) make it unnecessary. Even a point-and-shoot camera can take high-quality Milky Way photos if it has manual mode and shoots raw.
But a good camera sure makes things easier. If you have the option, a full-frame is a way to go. They also have more lens options for photographing the Milky Way than APS-C cameras.
Wide-Angle Lens with f/2.8 or Greater Maximum Aperture (3/4)
Longer shutter speeds can be used with wide lenses without blurring the stars. Large apertures also allow you to capture more light, which is important because a lack of light is the most difficult barrier to high-quality Milky Way shots.
However, just as with lower-quality cameras, you can now use slower lenses or telephotos for Milky Way photography without sacrificing image quality. All you need is a tracking head or image averaging.
However, wide-angle lenses with a large maximum aperture are still the best. This is especially true if you want to do some unique photography, such as capturing details in the Northern Lights, which cannot be easily improved with star tracking or image averaging.
Note: If you want to make some adjustments to the photo just let me know. I can do it for you at a very low cost. You can hire me to edit your photo.
Headlamp with Red Light Mode (4/4)
A headlamp is one of the most important pieces of equipment you can bring for Milky Way photography. With a headlamp, you can set up your camera and adjust the composition without using your hands. Unlike many flashlights, most headlamps have a low-light mode.
Choose one that has a red light mode because it does not strain your night vision as much as white light does. Just remember to turn off the headlamp before taking photos, or you’ll have a red foreground!
Bright Flashlight (3/4)
Even though I usually navigate at night with a headlamp, it’s always a good idea to have a bright flashlight on hand. One of the simplest ways to focus on the night sky is to shine a flashlight in the distance and focus on that instead, emulating infinity focus.
This is the one I use because it is small, lightweight, and has adjustable brightness. If you already have a good one, don’t change it.
Light Painting Gear (2/4)
In my Milky Way photos, I’m not much of a light painter. Some people adore it and regard it as a necessity. Depending on what you’re trying to achieve, the best light painting equipment ranges from flashes to lightsticks to drones with lights attached.
When I wanted to do some light painting, as in the bridge photo below, I used my flashlight or headlamp to provide some foreground illumination.
Focus Aid Filter (2/4)
Lens filters aren’t typically associated with Milky Way photography, but there are a few types that photographers will employ on occasion. A focusing aid filter is one of these. It works by adding streaks to the stars in your photo, which are misaligned when the star is out of focus and aligned when the star is in focus. The idea is to attach the filter, focus it, and then detach it.
There’s nothing wrong with them (they work well), but I find them no faster or easier to use at night than the other focusing methods I prefer. However, if the other methods cause you to strain your eyes, you are free to obtain one.
Light Pollution Filter (2/4)
A light pollution filter, which is designed to filter out some of the yellow colors of light that are common near cities and towns, is another somewhat common filter for Milky Way photography. While light pollution filters may appear to be a good idea, they frequently cause enough color shifts in the foreground (as well as blurry corners on the cheaper filters) that I do not recommend them. They’re most useful for deep-sky astrophotography in polluted areas when a star tracking head (see below) is used to maximize image quality.
Star Tracking Head (3/4)
A star tracking head is one of my favorite accessories for taking high-quality photos of the night sky. To use it, simply point the head at the North Star – or an equivalent area in the Southern Hemisphere – and it will track the rotation of the stars throughout the night (technically the rotation of the Earth, but we all know what I mean). You can use a standard tripod head to compose your photo however you want. Star trails will be eliminated wherever you point.
However, when using a star tracker, “earth trails” – i.e., a blurred foreground – are unavoidable. Some photographers prefer to take a second, non-tracked photo of the foreground and then combine the two in Photoshop. Others use star tracking heads for deep-sky astrophotography anyway, so they don’t have to worry about a foreground in the first place.
Whatever you choose, star tracking heads can provide incredible image quality at night. I used a fourteen-minute exposure to capture the image below (plus a separate shot for the foreground). You can see how detailed those stars are in the crop afterward.
Tripod Leveling Base (2/4)
A tripod leveling base is useful if you want to take panoramas at night to capture the entire Milky Way. Leveling bases are placed directly beneath the tripod head and have a few degrees of movement in each direction, allowing your tripod head to be completely level even if the tripod legs aren’t. You can then rotate the tripod head to take multi-image panoramas without introducing a significant tilt to your shots.
There are more advanced setups if you want to do complex nighttime panoramas (our friend Aaron Priest is known for this), but a leveling base is a good starting point for basic panoramas.
Remote Shutter Release (3/4)
It’s common in Milky Way photography to use unusual settings that are much easier to achieve with a remote shutter release. A remote release of some kind can be very useful when trying to capture star trails with an hour-long exposure, a timelapse movie, a sequence of images to blend later, or anything else unusual. Although most cameras include built-in intervalometers, a separate remote usually has far more functionality.
Battery Management System (3/4)
If you’re shooting a timelapse or sequence of images at night, make sure you have plenty of batteries. Cold nights deplete battery life faster than you may be accustomed to, as does continuously recording images one after the other.
Many cameras now support continuous power over USB, which means you can charge your camera all night with a high-capacity external battery pack. If yours does not, you should consider investing in a standard battery grip, which can at least double the capacity of most cameras.
If you’re not shooting a timelapse and don’t mind interrupting your camera for a moment, the simplest option is to bring a bunch of extra batteries and swap them out when they reach one bar.
Warmth (4/4)
It’s easy to get cold while photographing the Milky Way, especially if you’re just standing around next to your tripod in the middle of the night.
With no sunlight to keep you warm, even a seemingly mild night of 15 degrees Celsius / 60 degrees Fahrenheit can become uncomfortably cold. Bring more jackets than you think you’ll need, as well as hand warmers, a hat, gloves, and other accessories – even if it seems excessive. Bring a camping chair, a blanket, and a portable speaker to enjoy the evening while your camera takes pictures.
Milky Way Tracking App (3/4)
Even if you’re in the Southern Hemisphere, the Milky Way is generally found to the south (though it’ll be much more overhead to you if that’s the case). It begins the night in the Southeast and moves southwestward.
Still, it varies greatly depending on the season and where you are in the world. Rather than simply looking South, it’s a better idea to have an app that can track the Milky Way and show you where it’ll be at any time and date in the future.
There are numerous such apps available. I have no affiliation with them, but I like PhotoPills, which superimposes an augmented reality view of the Milky Way on the landscape in front of you at whatever time/date you choose. I’m sure others do something similar, but in any case, I recommend a Milky Way tracking app to make your life a little easier.
Other Apps (3/4)
It’s difficult to keep track of all the other potentially useful apps for Milky Way photography. You’ll need a good weather app that shows cloud cover details; I use Astrospheric, which is free. There are numerous apps available for deep-sky astrophotography that show where to look for specific details in the sky. I haven’t been particularly impressed with any of the ones I’ve tried, but I do use two that are passably good called Star Chart and Star Walk 2. Then I’d recommend PhotoPills again because of its moon and meteor shower information, as well as specific features for calculating star trails. However, it is a $10 app, whereas the others are free.
Sequator or Starry Landscape Stacker (3/4)
As much as I enjoy using a star tracker to capture the best image quality at night, there’s another technique I prefer even more: image averaging. With the right software, you can load multiple photos of the Milky Way to be averaged together, reducing noise and improving image quality dramatically.
Sequator (Windows) and Starry Landscape Stacker (Mac) are the two best options for aligning the stars before averaging your photos. They leave the foreground and any other stationary objects in the image alone. For the most part, the image quality is comparable to that of a star tracker.
This sort of software is why I’m comfortable using an f/4 lens (the Nikon Z 14-30mm f/4) as my primary Milky Way photography lens these days. It’s also allowed me to get dramatic improvements to my depth of field at night, as you can see in the photo below, where I was able to use f/8 and take 33 photos to average:
For what it’s worth, you can also take image averaged photos of deep-sky objects (or even use a combination of image averaging and a star tracker) to get very high levels of image quality. If you don’t have a foreground in your photo, the best software options are DeepSkyStacker (Windows) and Lynkeos (Mac), both of which are free. Again, I have no affiliation with any of these, and there may be others out there that are similarly good – just sharing what I’ve used.
Topaz Denoise or Similar (3/4)
The post-processing stage is the final step in Milky Way photography. Most Milky Way photos have a lot of noise, so a good noise reduction product is essential. I generally use Lightroom’s noise reduction, but not because it’s superior to other software. It isn’t; it’s simply convenient. I recommend downloading Topaz Denoise or some similar artificial intelligence noise reduction software to get the best results.
Conclusion
I hope this article has helped you decide what equipment you’ll need for Milky Way photography! Please let me know if there is anything I missed in the comments section below. This is what I use to photograph the Milky Way, but there are so many advanced options if you’re interested in this genre – everything from dedicated telescopes for deep-sky astrophotography to specialized cameras for photographing other planets in the Solar System. Literally, the sky is the limit.
Note: If you want to make some adjustments to the photo just let me know. I can do it for you at a very low cost. You can hire me to edit your photo.
LATEST POST
- Best AI tools for Facebook Ads
 If you’re seeking to improve your Facebook advertising strategies, Birch or Revealbot, AdEspresso by Hootsuite, and Zalster are exceptional AI tools that enhance efficiency and maximize ad performance.
 - Photo Editing Mistakes
 Excessive editing, Oversaturating colors, Blurred images, Too much HDR and Overdoing filters and effects are some of the top photo editing mistakes to avoid for crafting stunning pictures.
 - Best AI tools for lead generation
 Explore Customers.ai, Instantly, Seamless.AI, and LeadIQ are some of the best AI tools for lead generation as they provide you with client’s details for closing deals. Uncover its key features, affordable pricing, and customer reviews.
 - Benefits of Digital Business Cards
 What is a digital business card? Discover the benefits of digital business cards and how to create digital business cards suitable to your professional image and networking efforts.
 - Best web design companies in Trivandrum
 Rainx LLP, Oregon Technologies, Redwet Solutions, and Globify Digital Solutions are among the best web designing company in Trivandrum, specializing in website development.

