HOW TO MAKE A GRADIENT IN PHOTOSHOP
Step by step guide: How to add a gradient in photoshop
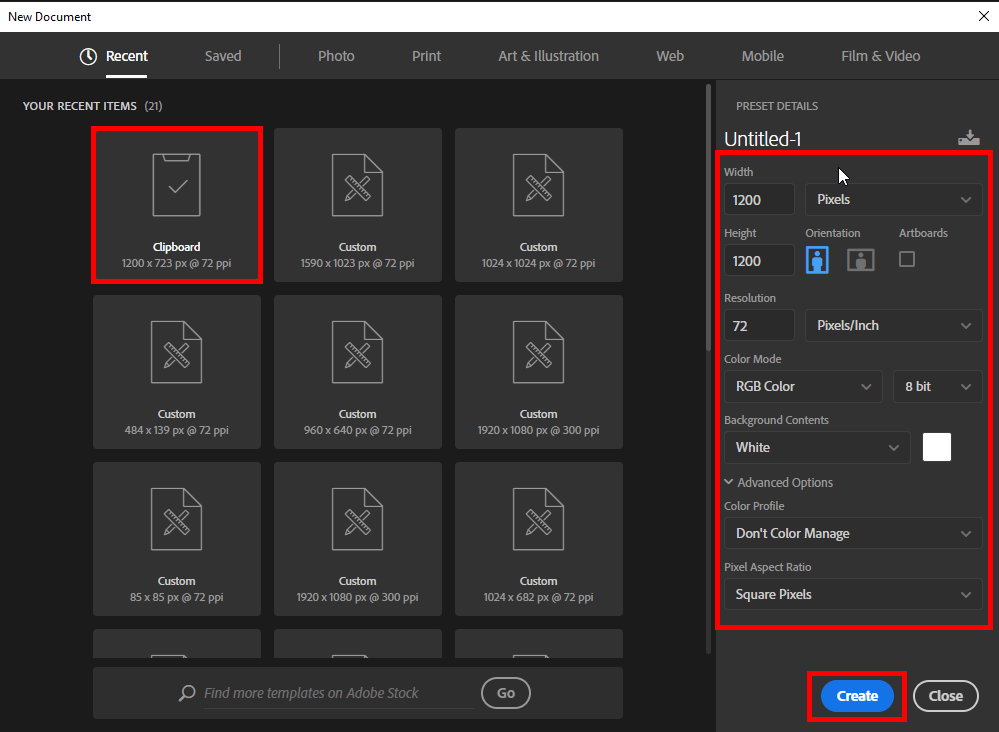
1. Create a new document
Start with launching Photoshop. Create a new document. Enter the preset details you see in a screenshot below.
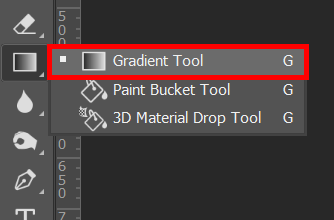
2. Grab a gradient tool
Next, grab the Gradient Tool (G) in the Tools panel.
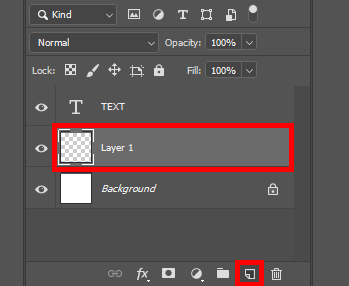
3. Add a new layer
Then, add a new layer by clicking the “Create a New Layer” button at the bottom of the Layers panel. If this panel is hidden, activate it by pressing F7.
If you prefer using Photoshop keyboard shortcuts, use the Shift+Ctrl+N/Shift+Cmd+N key combination to create a new layer quicker.
4. Open more options
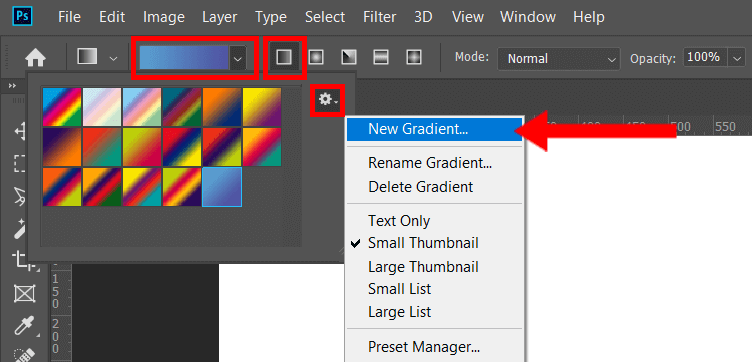
You’ll notice the “Gradient Bar” at the top of the screen. This is where you can choose one of the ready-made templates, or customize the look of your gradient. Click on the dropdown arrow next to the gradient fill dialog box.
You’ll see a selection of default gradients. To extend this selection, click the settings icon and go to “New Gradient.”
5. Name the gradient
Come up with a name for your gradient. Enter the name in the window that opens and click “ОК.”

6. Choose a color
In the “Gradient Editor” window, click on a color stop. You’ll see a “Color Picker” appear. Choose the color you like.
The square on the left is the color your gradient starts with, and the color on the right is the shade it fades into.
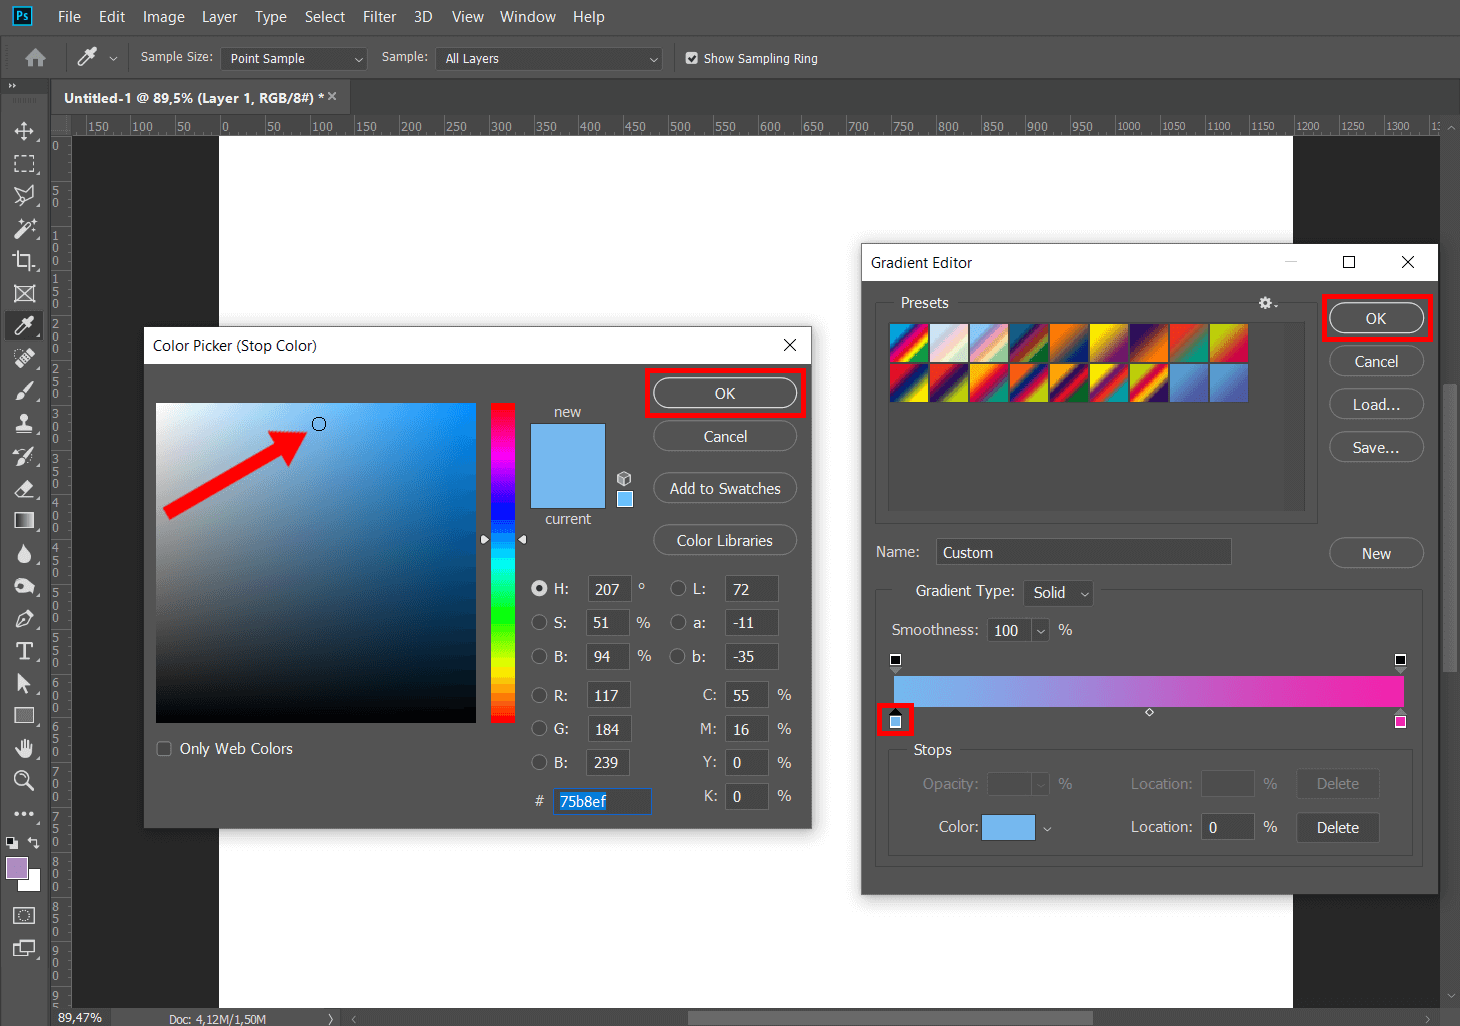
7. Set a starting point
Once you have done that, click and hold to set a starting point.
8. Pick a style
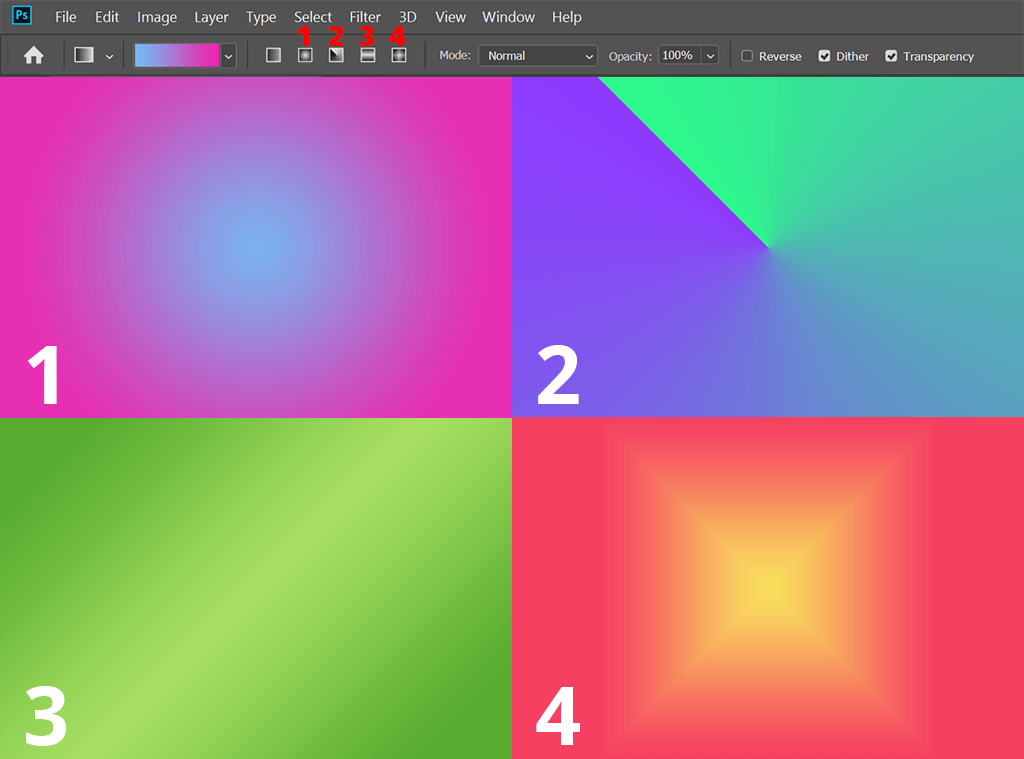
Gradients come in different types, and you can select the one you like the most. Up at the top bar, you’ll see 5 icons that stand for different gradient types.
Besides a linear gradient, which is a classic option that everyone is familiar with, there are 4 more that are less popular.
A radial gradient is when one color starts in the middle in the form of a circle and then gradually changes into the next color. It visually resembles the sun.
Angular is a counter-clockwise color sweep. It has 2 solid colors that gradually change into one another.
A reflected gradient is basically a simple linear gradient with a reflection.
Diamond resembles the radial gradient. The only difference is that here you have a diamond in the middle, instead of a circle.
9. Done! Save the result
You’re done! You’ve successfully learned how to make a gradient in Photoshop.
To save the final result, go to the “File” tab, and navigate to “Save As.” Alternatively, use the Shift+Ctrl+S/Shift+Cmd+S shortcut.
Note: If you want to make some adjustments to the photo just let me know. I can do it for you at a very low cost. You can hire me to edit your photo.


