How to Make an Animated GIF in Photoshop
Estimated reading time: 12 minutes
A GIF is a moving picture. A GIF is a small video clip or a collection of still pictures that appear to move. GIFs do not have to be difficult in order to function properly. Sometimes, simple movement is appealing. GIFs are popularly used in marketing or to produce memes, mostly to create a visual aid or to make a statement. In this article, you will learn how to make an animated GIF in Photoshop. So, let’s start.
Table of contents
Know Photoshop

To start, explain Photoshop because these features are professional ways done in Adobe. Adobe Photoshop is a computer image editing software created by Adobe Inc. Photoshop is commonly considered as one of the most powerful photo editors currently available. It has advanced features that will appeal to a wide range of artistic beginners and professionals.
I’m starting to make animated GIFs from pictures.
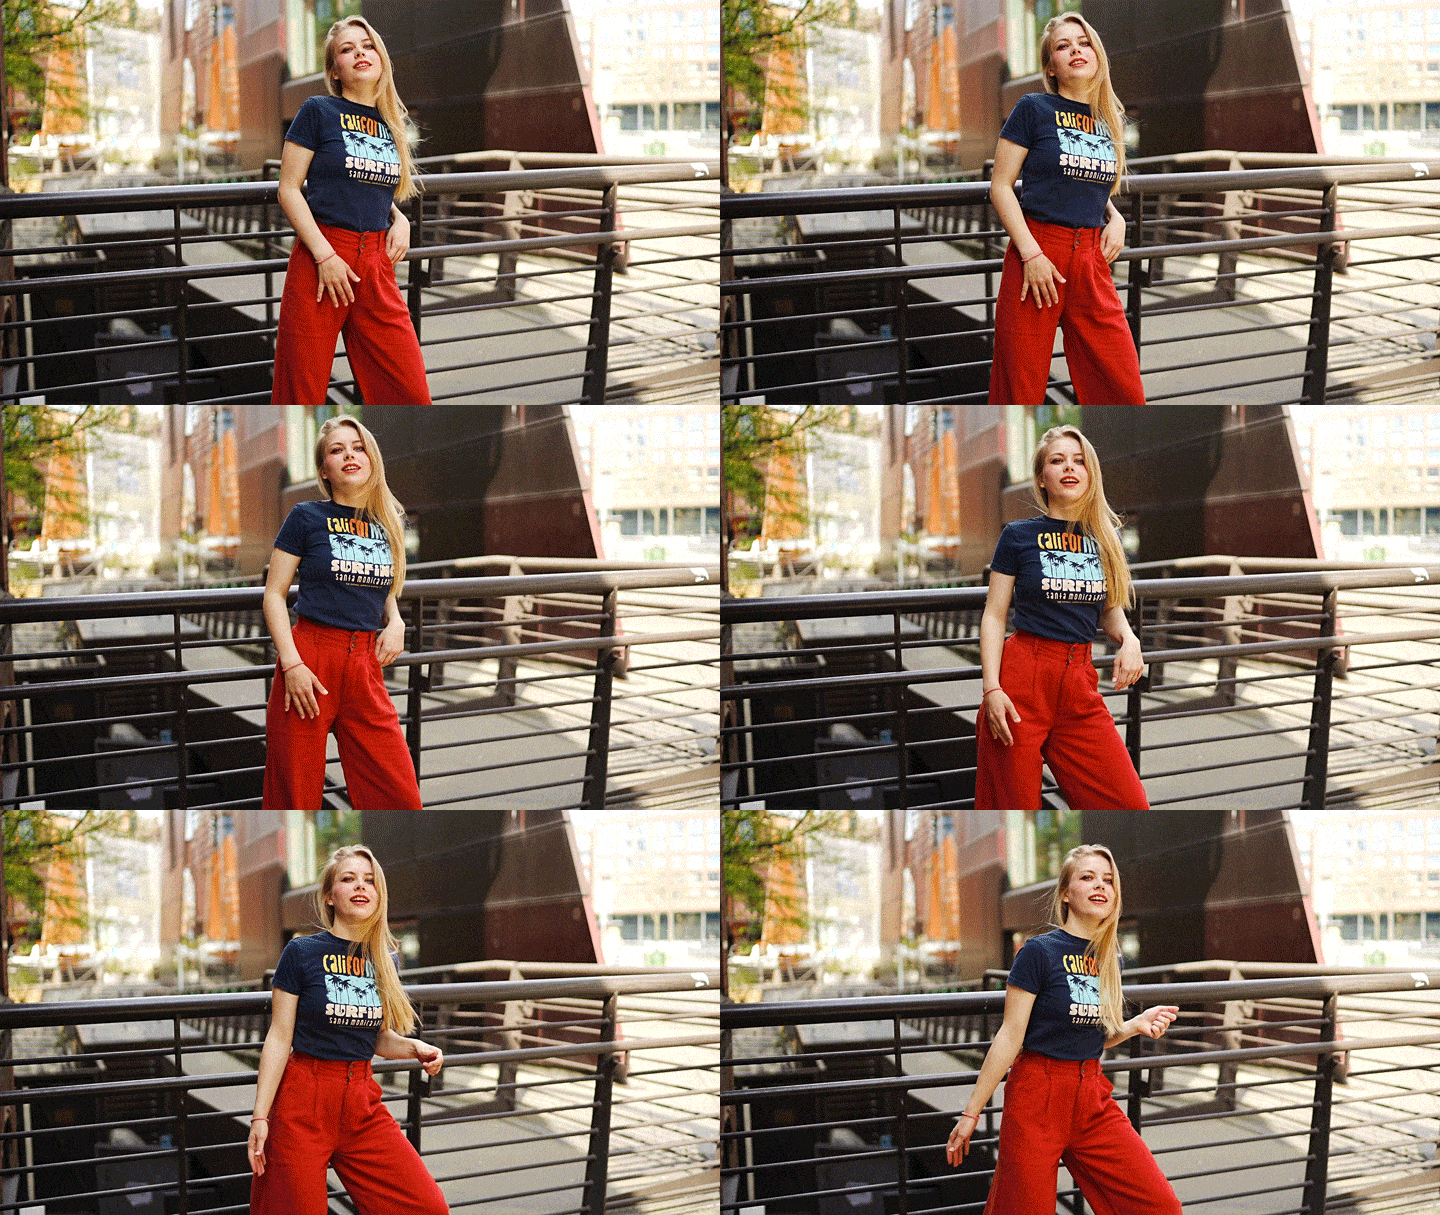
By combining two or more images, GIFs give the effect of motion. Most of the parts in the image will remain the same. However, at least one element changes between images. It could be an object or a person that is starting to move. An animated GIF is not hard to create. One frame may comprise a message or logo, while the other is not. A sequence of still pictures taken as part of a time-lapse can be used. Alternatively, you can make those changes super simple in post-processing. A GIF with several images in motion is smoother. very few frames with bigger movements look like stop-motion motion graphics.
Note: If you want to make some adjustments to the photo just let me know. I can do it for you at a very low cost. You can hire me to edit your photo

Animated GIFs from pictures
step 1: Select Images
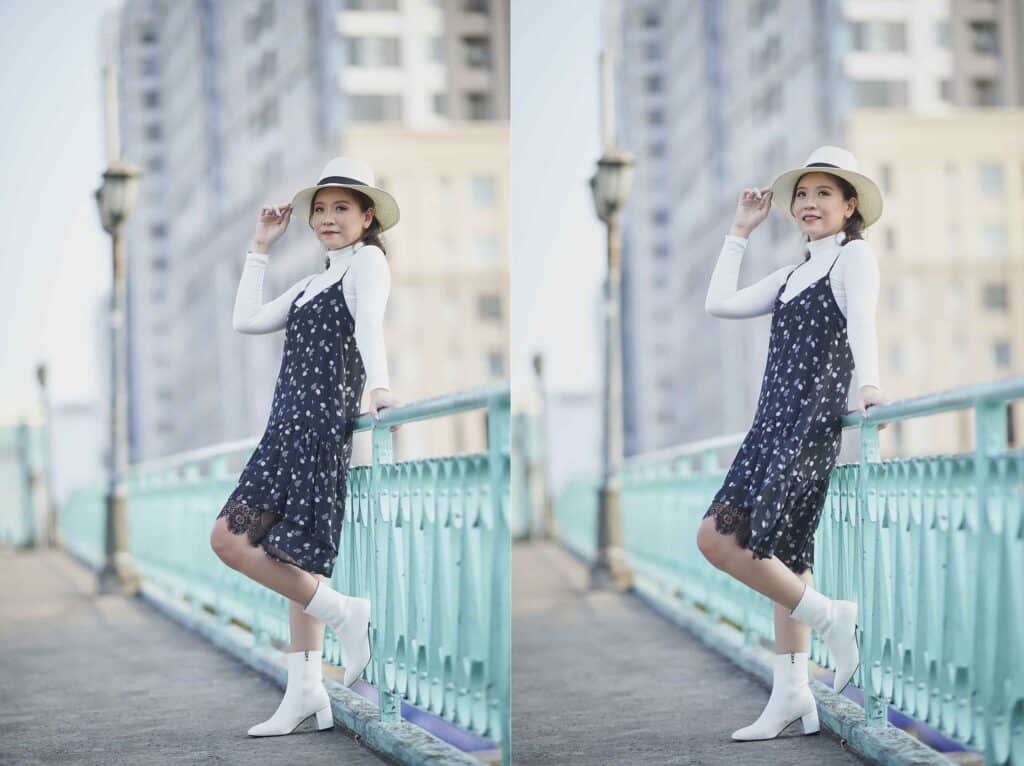
Select the images for use in the animated GIF. To create the illusion of motion, just pictures are needed. But you can also select up to 100. It totally depends on you. However, if you have more than 100 images, your GIF could take quite a long time to load on a website. Let’s create a GIF in Photoshop that relates to a picture before and after unique post-processing phases.
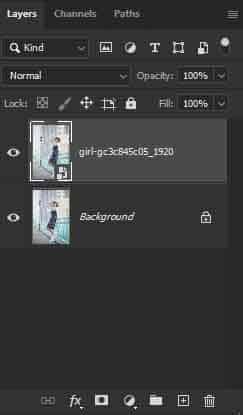
step 2: Open the images as layers
⦁ Upload the files into Photoshop as separate layers. Highlight the pictures in Lightroom and choose the Picture drop-down menu. Go to Photo > Edit in > Open as Layers in Adobe Photoshop.
⦁ If users open files directly in Photoshop, it means saving those in the same folder. In Photoshop, go to the File menu and select “File > Scripts” to load files into a stack.
⦁ Next, select Browse and browse to the pictures that will contain your GIF.
⦁ Click “Open,” then OK.
⦁ Users can auto-align layers by choosing Edit > Auto-Align Layers from the Edit drop-down menu. Users have many options, but auto is generally sufficient.
⦁ Duplicating a layer allows you to add text and images. By choosing the Layer drop-down menu, users can combine text with the duplicate layer. Choose Layer > Merge.”
step 3:website image size
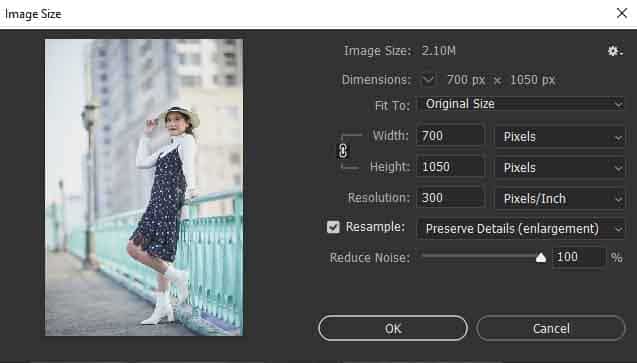
Photoshop can open RAW images as well as other file types. However, all of those extra pixels are useless while creating a GIF. Large images slow down the graphics and create a file too big to display on the web. A GIF must be 480 pixels on the longest side. Even so, it is possible to make it as large as 720 pixels.
⦁ Choose an image from the drop-down menu.
⦁ Choose an image > Image Size.
⦁ Enter the smaller pixel size in the Size of the Image window. and then click OK.
step 4: Create a Frame Animation
When working with video or animation, you’ll require Photoshop’s Timeline window.
⦁ Go to the Windows drop-down menu to open it.
⦁ Navigate to Window > Timeline.
⦁ At the bottom of your workspace, a new Timeline window will appear.
⦁ Choose the arrow inside the center point of the window.
⦁ From the menu, select Create Frame Animation.
⦁ The top layer will be visible in the Timeline window.


step 5: Creating Frames with Layers
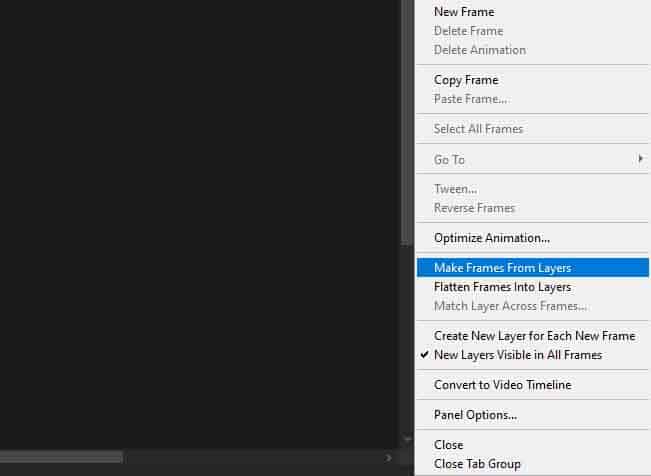
To see all the layers, right-click lines in the Timeline window’s top right corner. It helps bring up a new menu.
⦁ Select “Create Frames from Layers.”
⦁ In the Timeline window, the layers appear as individual frames. Users should be able to see all of the layers.
⦁ To change the structure, drag the images to a new place.

step 6: Set a timer for each Frame
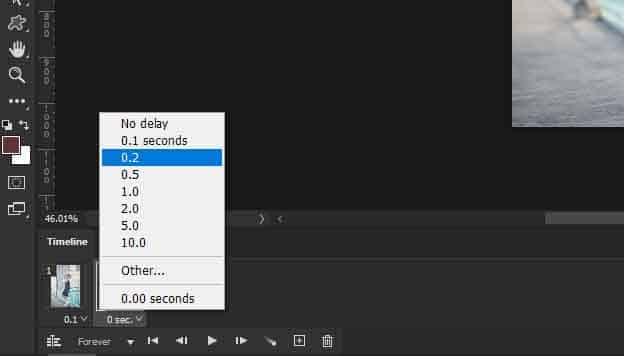
By mistake, the time shown below each frame is 0 seconds. Under every frame.
⦁ Click the mouse cursor next to “time.” You can change the time for personal frames or for all frames instantly.
⦁ To see a preview of your GIF, press the Play button.
⦁ Experiment with various time settings.
⦁ Select short times if you have a variety of images and want to have a smooth motion.
⦁ Choose a longer time if you want a stop-start effect. A GIF’s total time must be around 6 seconds, though the loop can be smaller. Many GIFs contain a single sign or motion, which can last not much more than a second.
step 7: Select the Loop
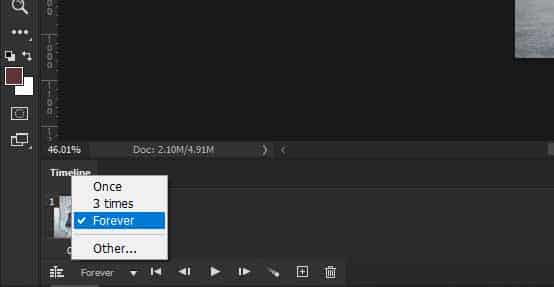
By mistake, the GIF will play endlessly.
⦁ Open the loop control menu to change it.
⦁ You have the option to play the GIF once, twice, or three times, as well as choose some other option.
⦁ To show your GIF, click the Play button once again.
step 7: save for the web
Go to the File drop-down menu and save your gif image file for the online platform.
⦁ Navigate to File > Export > Save for Web(Legacy).
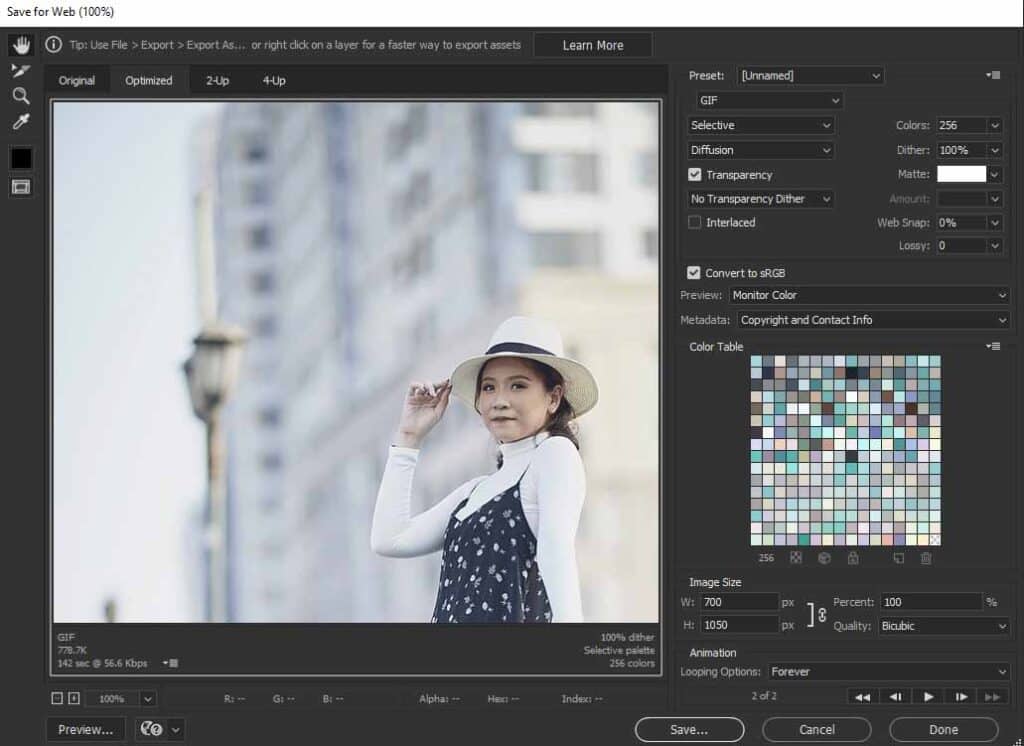
⦁ Select the GIF 128 Resampled present and save for the Web window.
⦁ It decreases the number of color options in your picture and makes the GIF load faster. Even so, the color gradients in one picture are mostly maintained.
⦁ When you click the Preview button, one GIF will open in a new window in your web browser.
⦁ Save the file. Select an area and click Save once more.
Animated GIFs from a Video
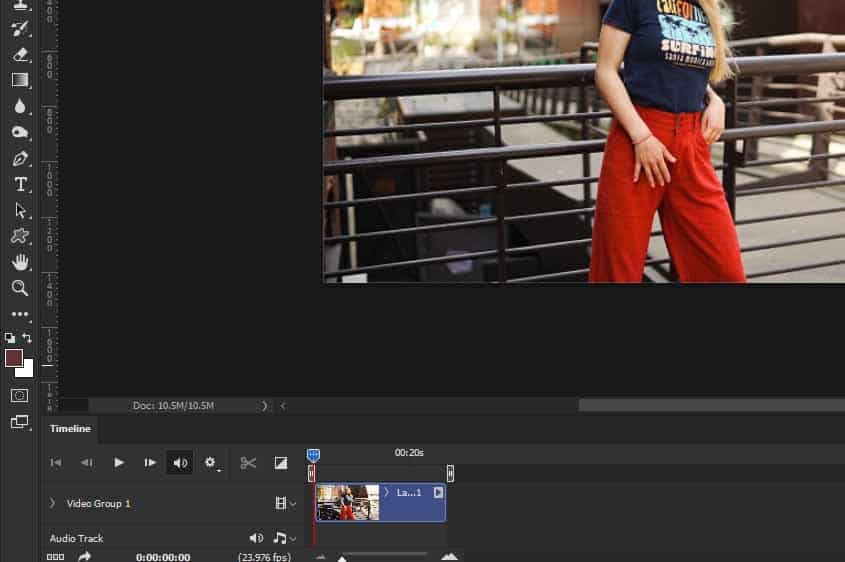
Creating an Animated GIF from a Video. Now you know about the video gif. In Photoshop, you can make an animated GIF by looping short videos. Users only need a very few seconds of video. The most difficult part is choosing where to start and end the loop.
step 1: Open the video in Photoshop
You can open a full video or even just particular parts in Photoshop. Users can also transfer individual frames from the video. Lightroom will offer video clips. However, you cannot export a video from Lightroom to Photoshop.
⦁ Go to the File drop-down menu and click File > Open to open the content directly in Photoshop.
⦁ Navigate to the video file and press the Open button. Its video will automatically open inside the timeline window.
⦁ Go to the File menu to import chosen frames from a video.
⦁ Select File > Import > Video Frames to Layers from the menu. Then navigate to a video file and press the Open button.
Almost all video files are captured at 30 frames per second. However, you do not want these several frames to make a GIF. So pick the “Limit to each and every” option and enter a value. Each of four or five frames is enough. To achieve the desired motion, use the smallest number of frames possible.
⦁ Select the Make Frame Animation checkbox. and then click OK. Each frame of the video is again converted into a layer.
⦁ Then, repeat the previous steps to make a GIF from still images.
step 2: Resize for the web
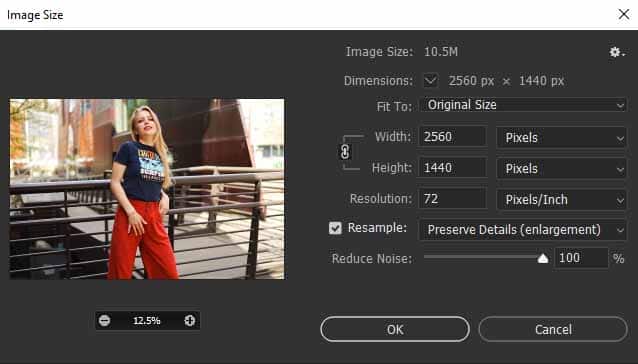
When GIFs are small video files, they run faster. So, go to the Image drop-down menu and change the size of your video for the internet.
⦁ Choose an image > Image Size.
⦁ Fill a size between 480 and 720pixel resolution on the long edge of the Image Size window. and then click OK.
⦁ You may receive a message that converting a video layer to a virtual hardware layer is needed. Select Convert.
step 3: Select the GIFs frames
Set the start and endpoints to support the short video you can use as your GIF. Once more, six seconds is an outstanding time duration for a GIF, though the loop could be smaller. Play the section a few times on loops. Make a note as to how the clip looks when it loops back to the start. Several GIFs start and stop suddenly. The jolt can be lowered by slightly trying to shift the start or end positions.

step 4: Save for the Web
Go to the File drop-down menu and save one animated GIF file for the web.
⦁ Navigate to File > Export > Save for Web (Legacy).
⦁ When you click the Preview button, one GIF will open in a new web browser.
⦁ Save the file. Select an area and click Save once more. You get a video loop now.
Conclusion
If you use a sequence of pictures or short video clips, you can easily create animated GIFs in Photoshop. In the Timeline window, select the Generate Frame Animation command. Then, save the GIF to the web. Don’t be upset if your GIF isn’t ideal. There is a culture of animated GIFs that have a handmade images. This is due in part to the restrictions of the GIF format. It’s become a standard GIF look.
Upload your GIF created in Photoshop to social media or your website. It must work smoothly. GIFs could be included in emails. They can even be found in Word documents. We hope knowing How to Make an Animated GIF in Photoshop was simple.
Note: If you want to make some adjustments to the photo just let me know. I can do it for you at a very low cost. You can hire me to edit your photo
latest post
- Peer to Peer File Transfer OnlineDiscover ToffeeShare and Blip, top peer-to-peer file sharing software that lets you transfer files quickly and easily, anywhere in just minutes!
- Best AI tools for FreelancersExplore top AI tools like Uma Upworks AI, ChatGPT, Canva, and Notion AI to supercharge your freelance work and maximize your productivity effortlessly.
- Google I O 2025 Top Web UpdatesWhat should you pay attention to during Google I/O 2025? Discover the announcements from the Google I/O event 2025, featuring Gemini 2.5 Pro, Beam 3D, AI Mode in Search, and Stitch.
- Company Profile WritingUncover the essential components of a company profile. Our guide covers how to write about your mission, history, and contact details to showcase your business effectively.
- What is CashKaro and How to use CashKaro cashback app?Discover CashKaro and transform your online shopping! Learn how to earn cashback effortlessly with the CashKaro app. Start enjoying discounts today!


