How to Resize Multiple Images in Photoshop
Estimated reading time: 6 minutes
Resizing images in Photoshop speed up the processing of many images, especially if you’ve worked on a lot of real estates. Resizing images for different use cases can be time-consuming, especially if many images need to be scaled. Fortunately, photo editing software like Adobe Photoshop allows you to quickly and accurately resize thousands of images.
Table of contents
How to Resize Multiple Images in Photoshop
Resizing a single image in Photoshop is easy, but what if you still need to resize multiple images? You can look at each individually, but it will spend a lot of time you might spend on something more creative. Follow these steps to find out how to resize multiple images of your real estate photo at once.
Create Folders
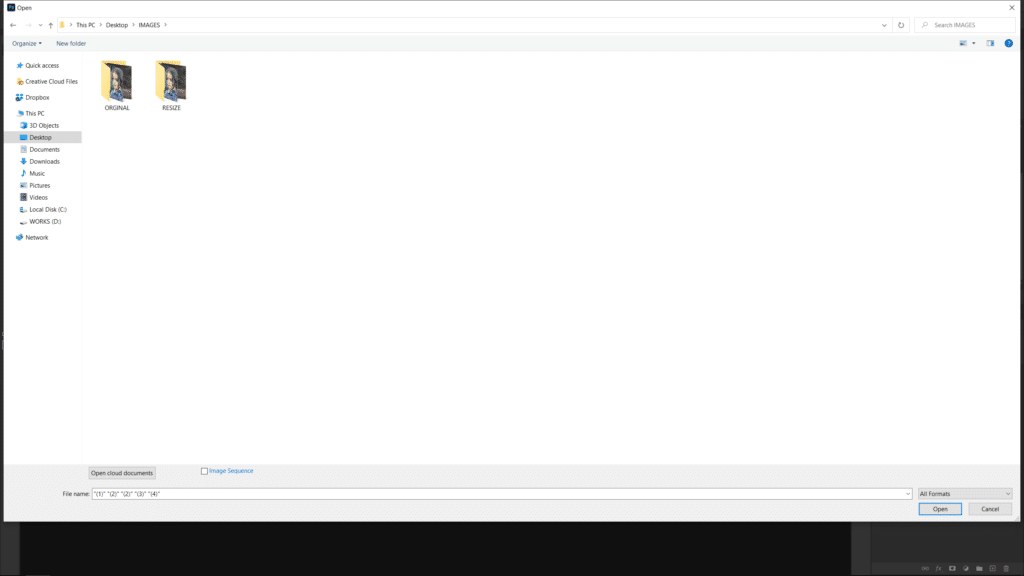
In this section, you will use the Automation> Batch processing feature to resize many images in a folder. Therefore, it is important to start with the appropriate folder. One is for raw photos and the other is for places to move after resizing. First, create two new folders. The first should be named “Original Image” and the second should be named “Resized Image”. Make sure the first folder contains all the photos you want to resize. Operation is mandatory. Now you can move Photoshop to a specific folder, resize all the images in that folder, and then upload it to another folder.
Create a New Action Set
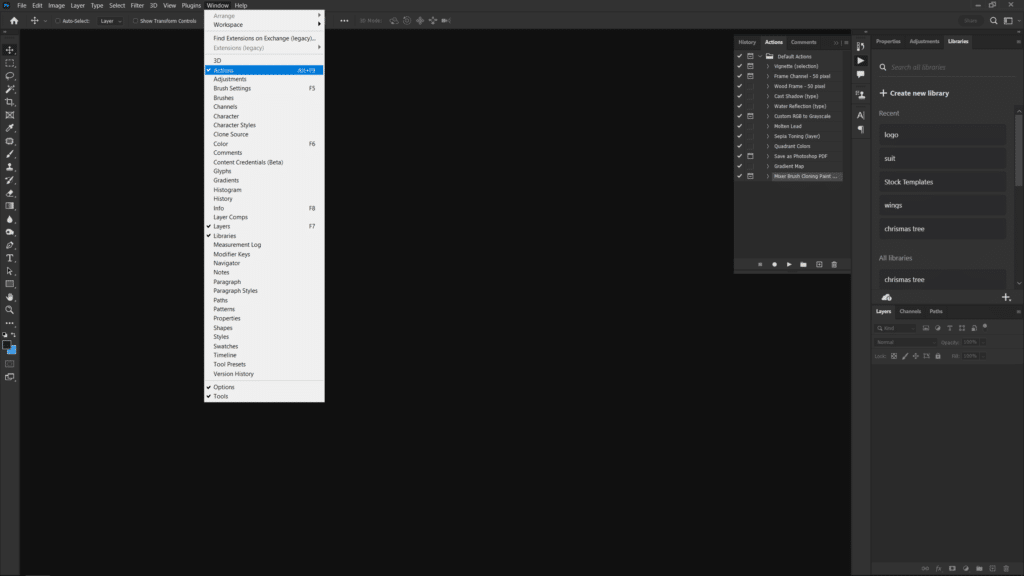
Photoshop Actions is a quick and easy way to resize all images in 1 second.
- Once you have already made the folders, open Adobe Photoshop and go to Window > Actions to enter the Actions panel.
- Now, in Photoshop, go to File > Open and select one of the pictures from the original folder.
- Click the Folder button in the Actions tab to create a new set for the action. Name the set “resizing action”, and then press OK.
- If you want to create a shortcut to make the action easier to do, select a function button from the drop-down menu and check shift and/or command.
Create a Resizing Photoshop Action
- To create a new action, choose the folder and then hit the Paper button. Once you’re done, click the Record icon to start recording your actions.
- Now that your action has been recorded, go to Image > Size and adjust the length or height of your desire.
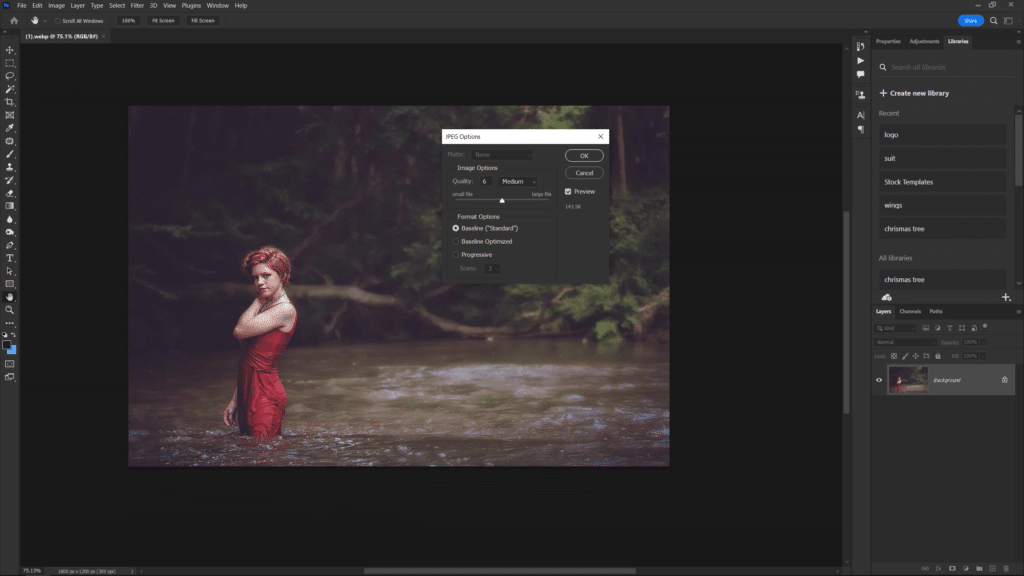
- After you have resized your image, click Save. Select the Resized Images folder by going to File > Save As. After you have selected your folder, ensure that you don’t change the name of the image before pressing Save. Then, for these jpegs, select the picture quality you desire.
- The final step in this procedure is critical. While the action is still recording, select File > Close or press Control-W to exit the Photoshop file. Before you press the Stop icon in the Actions panel, ensure that this is the last step of your action. If you skip this step, Photoshop will open all of the photos in the folder without shutting any of them. Based upon the number, it might make your computer slow or crash.
Using the Action
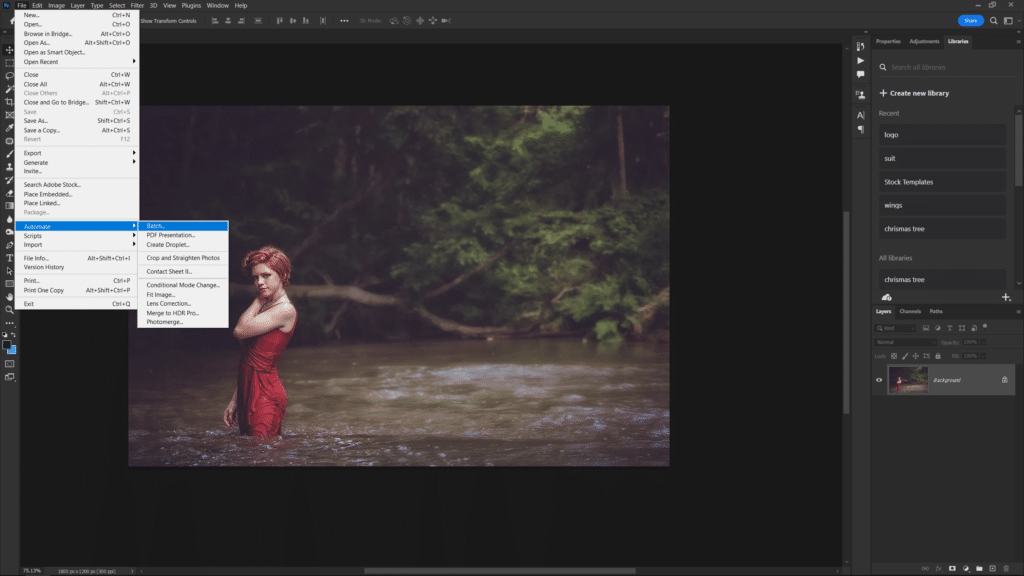
- The next and final step is to resize multiple images using the action we’ve just created. Open Photoshop. Go File>Automate>Batch.
- Choose the Action Set previously created and also the Action you want to execute from the Batch settings. Before you click OK, proceed to the folder containing the images you wish to resize. Since the original action saves your pictures to the Resized Images folder, any subsequent images will also be saved there. This process will now be repeated for each image in that folder, with every file closing before loading the next.
Batch Image Resizer Is an alternative
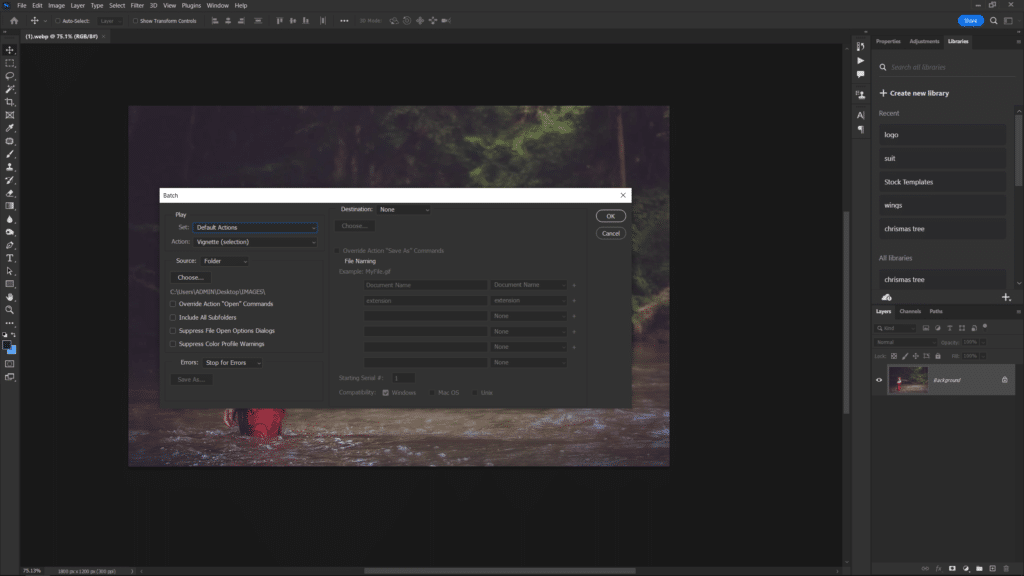
If the processes outlined above are too difficult to implement, you may want to try employing a batch image resizer to resize the images for you. All you have to do is:
- Open Photoshop and select File > Automate > Batch.
- The Batch window should now appear. Choose the set in which you produced your action, followed by your action.
- Where it reads Source, select Folder, and then click the Choose button to select the folder containing all of your photographs.
- You don’t need to pick a destination because you’ve already included it in your action.
- Note that if you want to add an extension to the file names of your photographs, choose Resized Images as your destination folder and then check Override Action Save As Commands.
- Now press the OK button. All of your resized photographs should now be in your “Resized Images” folder.
Conclusion
Not all images are the exact size, so it’s important to understand how and how images are resized. We hope that a useful article on how to resize multiple images in Photoshop will provide another important editing feature that will help you extend your real estate image.
Note: If you want to make some adjustments to the photo just let me know. I can do it for you at a very low cost. You can hire me to edit your photo
latest post
- Photo Editing Mistakes
 Excessive editing, Oversaturating colors, Blurred images, Too much HDR and Overdoing filters and effects are some of the top photo editing mistakes to avoid for crafting stunning pictures.
 - Best AI tools for lead generation
 Explore Customers.ai, Instantly, Seamless.AI, and LeadIQ are some of the best AI tools for lead generation as they provide you with client’s details for closing deals. Uncover its key features, affordable pricing, and customer reviews.
 - Benefits of Digital Business Cards
 What is a digital business card? Discover the benefits of digital business cards and how to create digital business cards suitable to your professional image and networking efforts.
 - Best web design companies in TrivandrumRainx LLP, Oregon Technologies, Redwet Solutions, and Globify Digital Solutions are among the best web designing company in Trivandrum, specializing in website development.
- Create a Digital Business CardCraft a digital business card that showcases your unique brand and personality. It’s simple to share and easy to update whenever needed. Plus, you’ll benefit from a free domain, hosting, and effortless social media integration. Ideal for professionals in any field!


